Caspersmum Posted May 9, 2007 Posted May 9, 2007 Hey guys, I'm feeling veyr proud of myself! I've not only completed Casper's cargo net, but he likes it too! I've got some photos to share - I've put one of them on my profile page, and I'll try to add some below (can't make any promises though! I keep getting error messages). If anyone wants to make one themselves, let me know and I'll add some instructions, Julia
Rachelh0901 Posted May 9, 2007 Posted May 9, 2007 ohh sounds fun, I might have a go in the near future. Alfie my baby CAG is more interested in snuggling into me and having cuddles at the moment :-)
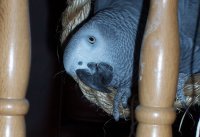
ZoesDad Posted May 9, 2007 Posted May 9, 2007 The net looks good!. Please, do share your design secrets.
Guest Posted May 9, 2007 Posted May 9, 2007 Julia, that looks very good and what's more, Casper seems to have a great time with it I'm also very curious to know your 'design secrets'
Caspersmum Posted May 11, 2007 Author Posted May 11, 2007 Right, here are the instructions! I used about 20m rope - I found it online, but phoned the supplier to check that it's not treated with anything. I used 24mm (1" for those of you on the other side of the pond!)manilla rope. I figured this was a good size for CAG feet. Be warned though - being so thick it's quite difficult to handle. Cut the rope in half (also difficult with thick rope)and then lay out one of the pieces on the floor - I wanted mine to be about 1.5m square (about 5feet) so I looped it back on itself to form a series of parallel lines of equal(ish) length. I then wove the other piece of rope at right anngles over and under the first piece. The gaps between the ropes are about 15cm (6"). Once it's laid out on the floor fiddle with it until you're happy with the spaces. I then tried my hand at splicing the ropes together (Casper nearly learnt some very rude words while I was doing this - but if you want a go there's some good websites to tell you how). If I was doing it again, I'd just do what I did with the other joints - knot them together with string. So get a ball of string. You need to cut lengths of about 30cm (1foot) and tie it really tightly round each place where the ropes cross. It sounds like a big job, but it probably only took an hour from start to finish. I made sure that there was enough string left over for extra chewing fun, and to tie toys onto. I tied on loads of chewable toys, then used an old towel rack as a frame to hang the net over (I figure you could get a joiner's trestle if you don't have anything suitable). I reckon the whole thing cost me about £30 - alot better than the £100 a similar size net costs online, and casper loves it. Just one word of caution - someone else pointed out about the danger of ropes for getting feet stuck in - so I don't let Casper play on it unless I'm in the room. I also check the knots regularly to make sure its still all holding firm. I hope this all makes sense - it really is easy to do, and if you're looking for a big cheap play frame its ideal. Let me know if you need any further knotting advice! Julia
Guest Posted May 12, 2007 Posted May 12, 2007 Julia, that's a very clear and easy to follow description. Thank you so much. Awfully nice of you to go through this trouble and explain us in such easy to understand language who you did this. {Feel-good-000200BB}
Caspersmum Posted May 12, 2007 Author Posted May 12, 2007 You're welcome Fairy! And I'd love to know if anyone else has a go - particularly about improvements on the design! Julia
Talon Posted May 12, 2007 Posted May 12, 2007 That is great! Thanks for sharing the directions. Looks like every grey's dream!:woohoo:
jtullos2 Posted May 12, 2007 Posted May 12, 2007 Could you please give the measurements in palms for those of us stuck in the old English system. j/k
fidsandfrats Posted June 14, 2009 Posted June 14, 2009 Hi I've been wanting to crate one myself. Do you have a piture of your finished product? I'd love to see it. Thanks for the instructions.

Recommended Posts
Create an account or sign in to comment
You need to be a member in order to leave a comment
Create an account
Sign up for a new account in our community. It's easy!
Register a new accountSign in
Already have an account? Sign in here.
Sign In Now